Essential Guide to Successful Basement Waterproofing: Protect Your Home from Water Damage
When it comes to homeownership, few things instill more dread than the thought of water invading your space. If you’ve ever suffered the disheartening effects of a damp basement, you know all too well how quickly your humble abode can transform into an indoor swimming pool—minus the fun of cannonballs and water slides. But fear not! This essential guide will navigate you through the often murky waters of basement waterproofing, ensuring that your home stays dry and devoid of unwelcome aquatic guests.
Understanding the Importance of Waterproofing
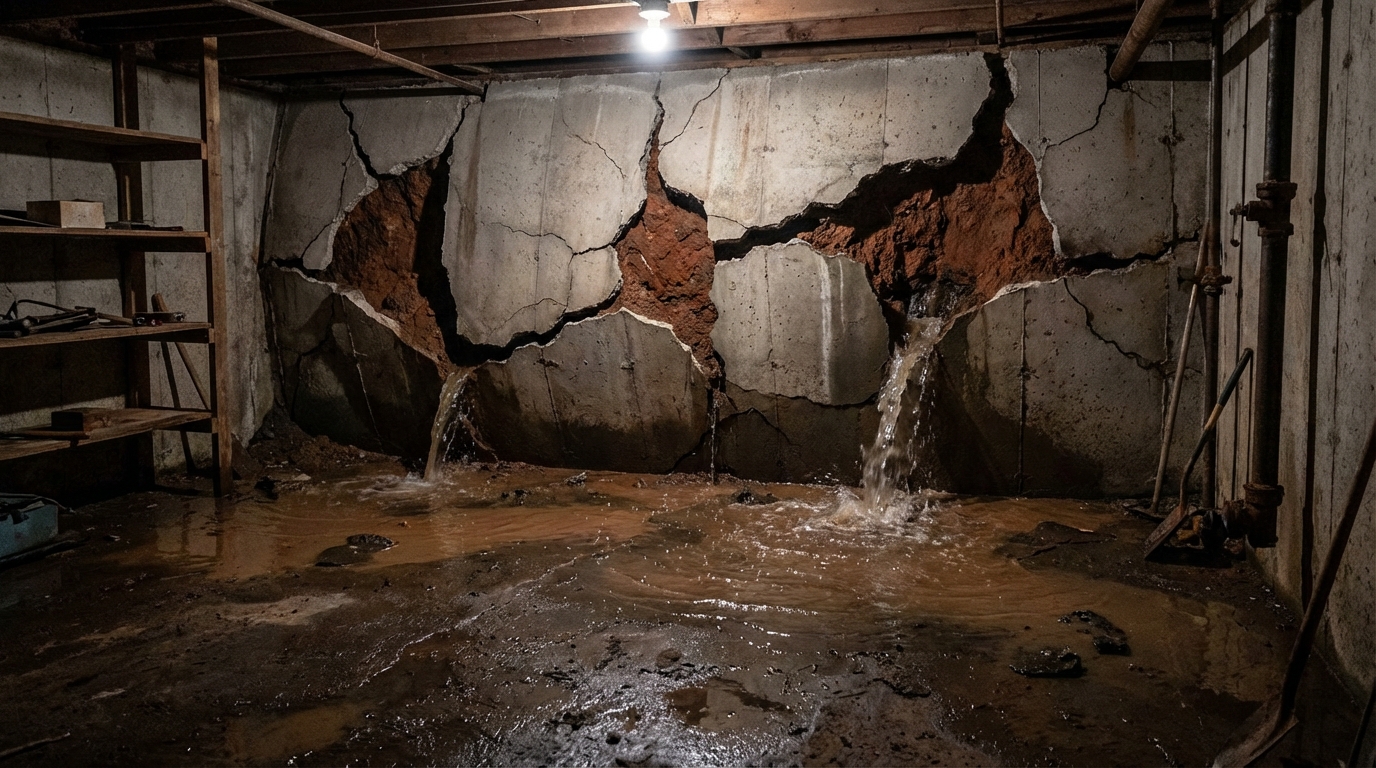
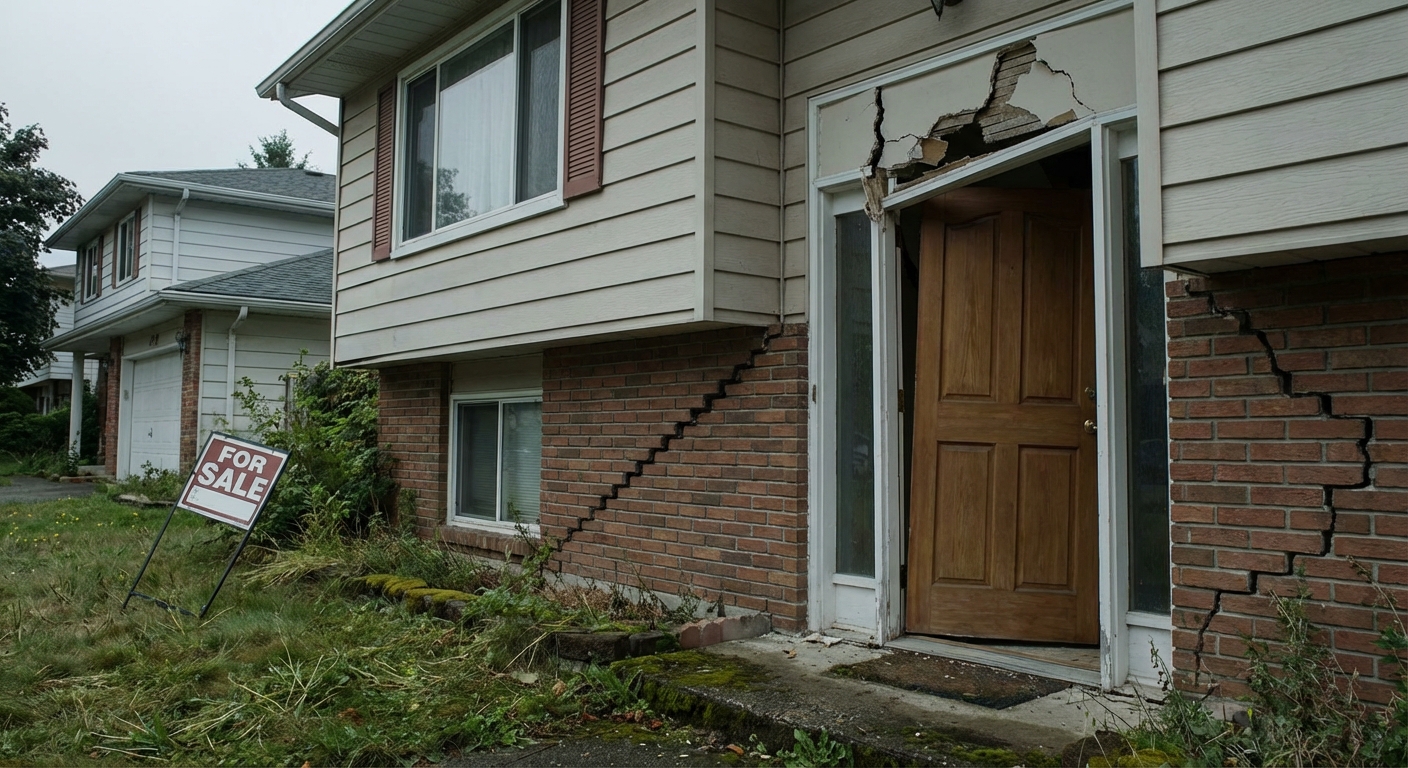
Before we dive into the nitty-gritty of basement waterproofing, let’s take a moment to grasp why it’s absolutely crucial. Water damage is not just an inconvenience; it can lead to serious structural issues, mold growth, and a slew of health problems. A wet basement is like a bad haircut—it may seem manageable at first, but it’s only a matter of time before it becomes a full-blown disaster.
According to the National Association of Home Builders, water damage is one of the top reasons for insurance claims in the U.S. In fact, studies show that nearly 60% of homes in the United States have some form of moisture in their basements. So, whether you live in a flood-prone area or just have a historic home with questionable drainage, basement waterproofing should be on your home improvement to-do list.
Signs of Water Problems in Your Basement
The first step in waterproofing your basement is recognizing the signs that water is already trying to make itself at home. Here are some key indicators that your basement could use a little TLC:
1. **Dampness**: If your basement feels musty or has visible moisture on walls and floors, that’s a clear sign that water is making its presence known.
2. **Water Stains**: Look for stains on the walls and floors that appear as dark patches or streaks—these are the battlefield wounds of previous moisture encounters.
3. **Mold Growth**: Mold isn’t just unsightly; it can pose health risks. If you spot mold in your basement, it’s time to act quickly.
4. **Cracks in Walls**: Hairline fractures in your foundation could act as entry points for water. Don’t ignore them!
5. **Puddles**: Standing water is an obvious red flag—your basement should not be a reservoir.
6. **Rusty Metal**: Corrosion on metal items stored in the basement can be a tell-tale sign of excessive moisture.
Now that you’re aware of what to look for, let’s explore the various waterproofing methods available to safeguard your basement.
Types of Basement Waterproofing Methods
There are several approaches to waterproofing a basement, each suited to different situations and budgets. Here’s a rundown of the main methods:
### 1. Exterior Waterproofing
If you want to tackle the problem head-on, exterior waterproofing is the way to go. This method involves excavating around the foundation walls and applying a waterproof membrane.
**Pros**:
– Offers long-term protection.
– Addresses the root of the problem by preventing water from reaching the foundation.
**Cons**:
– It can be costly and labor-intensive, requiring heavy machinery and professional help.
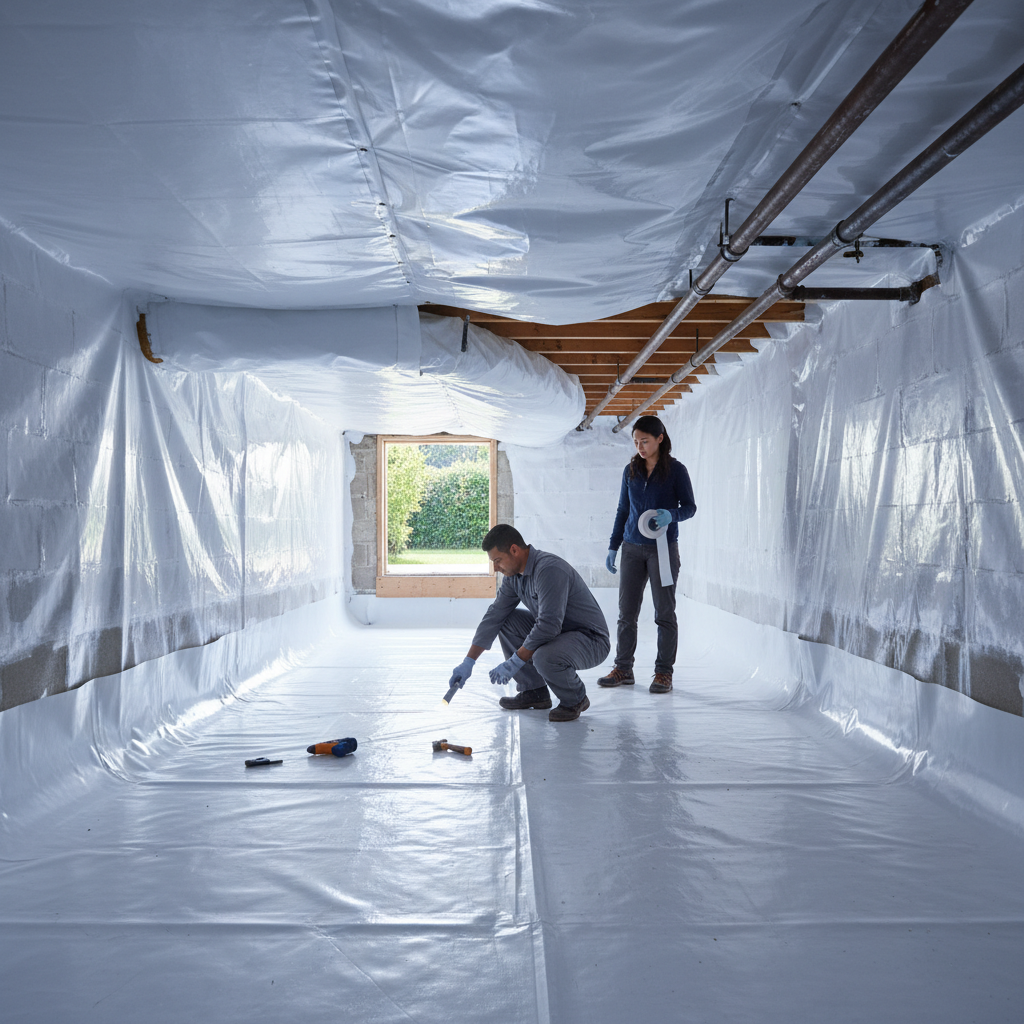
### 2. Interior Waterproofing
For those who prefer a less invasive solution, interior waterproofing methods can be effective. This approach typically includes the installation of sump pumps, drainage systems, and dehumidifiers.
**Pros**:
– Generally more affordable and easier to install than exterior methods.
– Can be done as a DIY project if you’re handy with tools.
**Cons**:
– Doesn’t address the source of the water, which means it may not be a permanent fix.
### 3. Sump Pumps
Sump pumps are like the superheroes of basement waterproofing—they work tirelessly to keep water at bay. These devices are installed in a basin to collect excess water and pump it away from your home.
**Pros**:
– Highly effective in preventing flooding.
– Relatively low maintenance.
**Cons**:
– Requires electricity to function, so be prepared for a backup power source during storms.
### 4. French Drains
A French drain consists of a trench filled with gravel and a perforated pipe that redirects water away from your foundation. Think of it as Mother Nature’s way of giving your basement a helping hand!
**Pros**:
– Efficiently diverts water away from your home.
– Can be installed inside or outside.
**Cons**:
– Installation can be complex, depending on the landscape.
### 5. Sealants and Coatings
Using sealants or coatings on interior walls can provide an additional layer of protection against moisture. These products create a barrier that prevents water vapor from seeping into your basement.
**Pros**:
– Budget-friendly option for minor moisture issues.
– Easy to apply as a DIY project.
**Cons**:
– Best suited for areas with minimal water intrusion.
### Key Steps to a Dry Basement
Now that you understand the different waterproofing methods, let’s walk through some essential steps to ensure your basement remains a dry haven:
1. **Assess Your Current Situation**: Identify existing water problems and determine the best waterproofing strategy based on your observations.
2. **Clean Gutters and Downspouts**: Ensure gutters are free of debris and that downspouts redirect rainwater at least six feet away from your home’s foundation.
3. **Grade the Landscape**: Make sure the ground slopes away from your house to facilitate water drainage.
4. **Install Proper Drainage Systems**: Depending on your chosen waterproofing method, you may need to install sump pumps, French drains, or other systems to manage water ingress.
5. **Seal Cracks**: Fill any cracks in the foundation with hydraulic cement or a similar product to prevent water from sneaking in.
6. **Consider a Dehumidifier**: Keeping humidity levels in check can help prevent mold growth and improve air quality in your basement.
7. **Regular Maintenance**: Conduct regular inspections and maintenance of your waterproofing systems to ensure optimal performance.
Common Mistakes to Avoid
As with any home improvement project, there are pitfalls to watch out for when it comes to basement waterproofing. Here are a few common mistakes to steer clear of:
1. **Ignoring the Problem**: Hoping the water will magically disappear is never a viable strategy. Address the issue head-on!
2. **DIY-ing Everything**: While some tasks are suitable for DIY projects, complicated waterproofing systems often require professional expertise. Don’t bite off more than you can chew!
3. **Neglecting Gutters and Drains**: Clogged gutters and ineffective drainage systems can exacerbate moisture issues. Keep them clean and functional!
4. **Overlooking Interior Solutions**: Some homeowners assume exterior waterproofing is the only solution. In reality, a combination of methods often yields the best results.
5. **Skipping Maintenance**: Just because your basement is waterproofed doesn’t mean you can set it and forget it. Regular maintenance is essential for longevity.
Wrapping It Up
Investing in basement waterproofing is like investing in life insurance for your home—it protects against the unexpected and saves you from costly repairs down the line. By following this essential guide and being proactive about potential water issues, you can enjoy peace of mind knowing your basement is safe, sound, and—dare we say—dry.
Remember, whether you opt for an external excavation or the trusty sump pump, the goal remains the same: keep the water outside where it belongs. And while you might not become the next waterproofing guru, you’ll undoubtedly be armed with the knowledge to protect your home from the dreaded water damage invasion. Cheers to your future dry basements!