Essential Steps for Effective Foundation Repair: Protect Your Home’s Stability
Your home is more than just a building; it’s a sanctuary, a repository of memories, and let’s be honest, a bit of an investment. So, when those cracks start appearing in your walls or the floors begin to sag, it can feel like your whole world is tilting on its axis. Foundation issues are not just cosmetic; they can compromise the stability of your entire structure. Fortunately, with a proactive approach and a few essential steps, you can address foundation repair effectively and protect your home’s stability.
Understanding Foundation Problems
Before we dive into the steps for effective foundation repair, let’s take a moment to understand foundation problems better. The foundation is the base of your house, much like the keel of a ship. Various factors can lead to foundation issues, including:
1. **Soil Movement**: Changes in moisture levels can cause soil to shift, expand, or contract, leading to uneven pressure on your foundation.
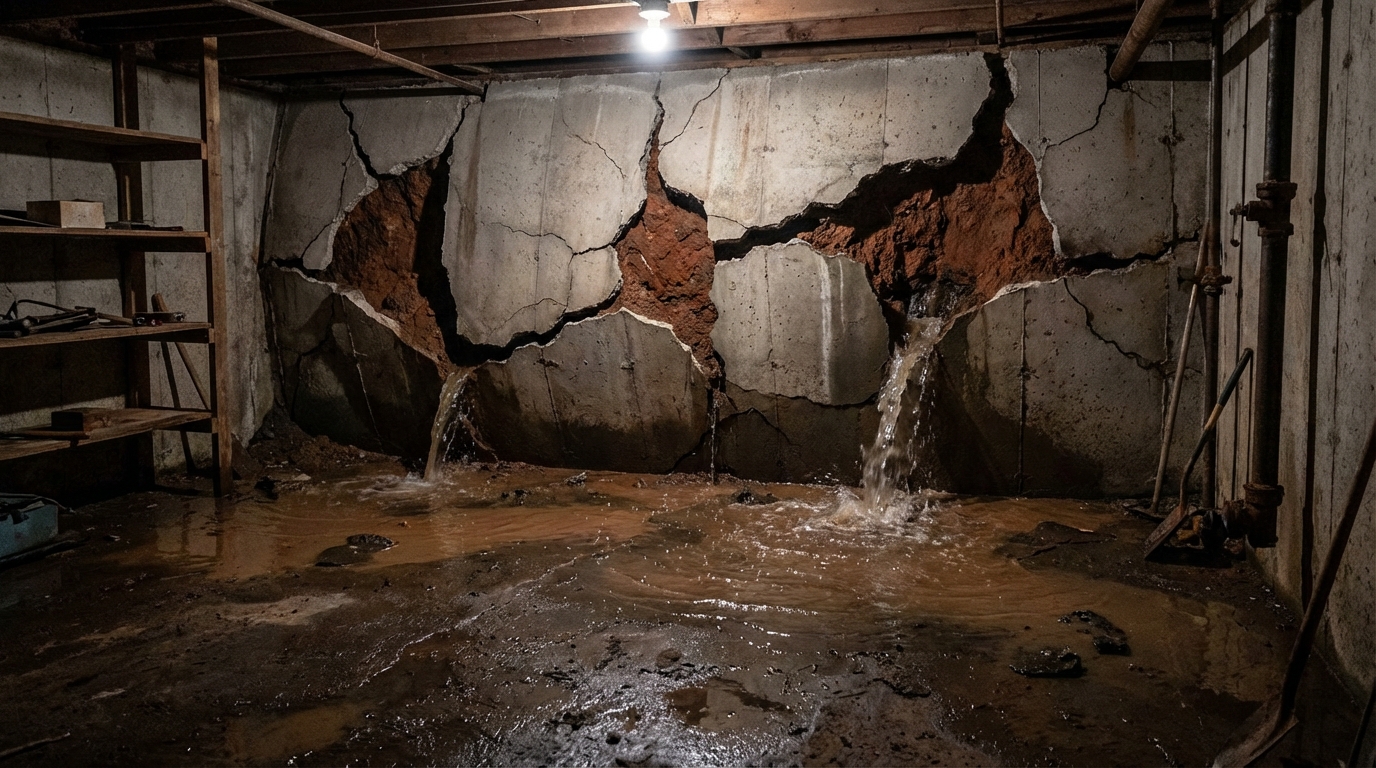
2. **Poor Drainage**: Water pooling around the foundation can erode soil and lead to settling.
3. **Tree Roots**: Large trees near your home can absorb water from the soil, causing shrinkage and movement.
4. **Poor Construction**: Sometimes, a shoddy job during construction can leave your foundation vulnerable from the start.
Knowing the problem allows you to take concrete steps (pun intended) toward fixing it!
Step 1: Identify the Signs of Foundation Issues
The first step in foundation repair is recognizing that you have a problem. Here are some telltale signs to watch out for:
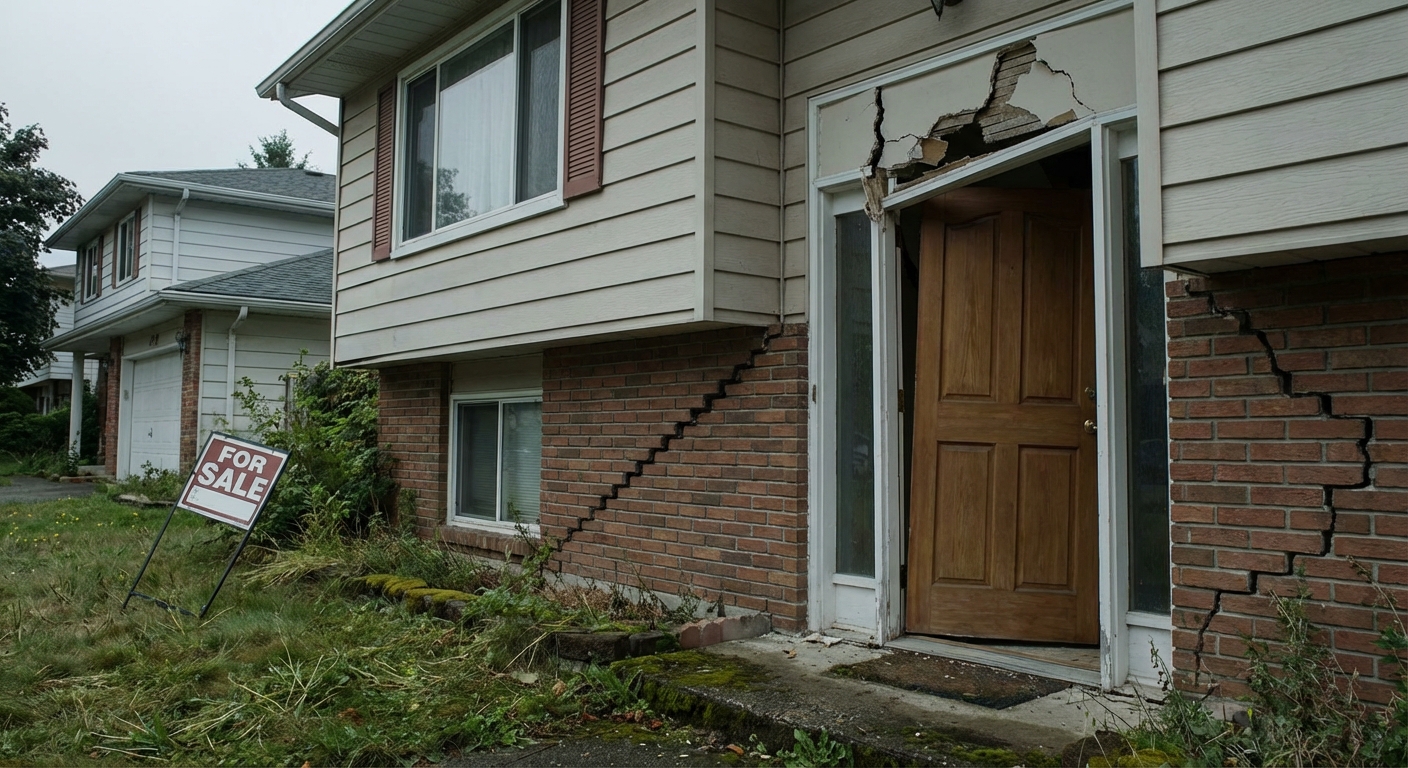
– Cracks in walls or floors
– Doors and windows that stick or don’t close properly
– Uneven floors
– Gaps between walls and ceilings or floors
– Leaning chimneys
If you notice any of these signs, don’t panic! It doesn’t mean your house is about to turn into a pile of bricks. More often than not, these issues can be resolved with timely intervention.
Step 2: Assess the Severity of the Problem
Once you’ve identified potential issues, it’s time to assess their severity. Grab a notepad and walk through your home. Make note of all the signs you’ve observed. You might even consider taking pictures to track changes over time.
For a more detailed assessment, it may be wise to hire a professional structural engineer or foundation specialist. They have the expertise to diagnose the problem accurately and recommend appropriate solutions. Think of them as the detectives of the construction world, armed with tools instead of magnifying glasses!
Step 3: Explore Your Repair Options
Now that you know what you’re dealing with, it’s time to explore your repair options. Depending on the nature and extent of the damage, you might consider the following solutions:
1. **Crack Filling**: For minor cracks, you can often fill them with epoxy or polyurethane foam to prevent further water infiltration.
2. **Underpinning**: This involves strengthening or deepening the foundation, particularly in cases where the soil has shifted significantly.
3. **Piering**: This process involves driving steel piers deep into the ground to provide stability and lift your foundation back to its original position.
4. **Grading**: Improving drainage around your foundation can help prevent future issues. This may involve re-grading the landscape to direct water away from the house.
5. **Installation of Drains**: Sometimes, installing French drains or sump pumps can effectively manage water accumulation around the foundation.
It’s crucial to consult with professionals before deciding on a course of action. After all, you wouldn’t want to perform heart surgery on yourself, right?
Step 4: Choose a Reputable Contractor
Selecting the right contractor can make all the difference in ensuring effective repairs. Look for companies that specialize in foundation repair, have good reviews, and provide warranties on their work. Do your homework – ask for references and check online reviews. A good contractor will not only fix your foundation but will also guide you through the process with patience and clarity.
Get multiple estimates. If one contractor seems significantly cheaper than the others, it may be a red flag. Remember, when it comes to foundation repair, you often get what you pay for. You don’t want to hire a bargain-basement service that ends up costing you more in the long run!
Step 5: Prepare for the Repair Process
Once you’ve chosen your contractor, it’s time to prepare for the actual repair. This means:
– Clearing the area around your foundation: Remove any plants, furniture, or debris that might obstruct the workers.
– Communicating with your neighbors: Especially if the repair work will be noisy or involve heavy machinery, giving your neighbors a heads-up can go a long way in maintaining good relations.
– Making alternative arrangements: If the repairs are extensive, consider arrangements for temporary housing or adjusting your schedule.
A little preparation goes a long way in making the process smooth and efficient.
Step 6: Understand the Repair Process
During the repair process, you’ll want to stay informed. Ask your contractor to explain what they are doing and why. Understanding the repair process not only keeps you in the loop but also helps you learn how to prevent future issues. Here are some common repair methods and what they involve:
– **Excavation**: The foundation may need to be excavated to assess and repair it properly. Your yard might look a bit like a minefield for a while, but despair not; it’ll be fixed soon!
– **Pier Installation**: If piers are part of the solution, this may involve drilling holes and placing supports underneath your foundation.
– **Wall Repairs**: If walls are bowing or cracking, they may require reinforcement or replacement.
Stay curious (but safe) during the process, and don’t hesitate to ask questions if something seems uncertain or concerning.
Step 7: Post-Repair Maintenance
Congratulations—your foundation repairs were a success! However, your job isn’t quite done yet. Maintaining the health of your foundation is an ongoing process. Here are steps to take post-repair:
1. **Monitor for New Issues**: Keep an eye out for any new cracks or signs of settling. Early detection can save you from costly repairs down the line.
2. **Maintain Proper Drainage**: Ensure your gutters are clean and functioning, and that water drains away from your foundation. Consider landscaping changes that promote drainage.
3. **Inspect Your Home Regularly**: Make a habit of checking for signs of foundation problems every year. It’s kind of like visiting your doctor—better safe than sorry!
4. **Keep Trees and Shrubs Away**: If you have large trees near your home, consider trimming them back or, if necessary, removing them altogether. Their roots can be a foundation’s worst enemy.
Final Thoughts: Foundation Repair Doesn’t Have to Be Scary
While foundation issues can feel intimidating, they’re not insurmountable. By following these essential steps for effective foundation repair, you can protect your home’s stability and maintain its value. Remember, the key is early detection and proactive maintenance. And who knows? You might just become the foundation repair guru in your neighborhood, dispelling myths and sharing wisdom like a true home-improvement hero.
So, keep your eyes peeled, your foundation strong, and your sense of humor intact. After all, a stable home is a happy home!