Essential Steps to Prevent Water Damage: A Comprehensive Guide to Basement Waterproofing
Water damage is an uninvited guest that everyone dreads, especially when it decides to throw a party in your basement. While some homeowners may think that a little water here and there adds character (who doesn’t love a bit of ambiance?), the reality is that water damage can lead to structural issues, mold growth, and a significant hit to your wallet. But fear not! With a solid plan and some elbow grease, you can keep your basement dry and protect your home from the perils of moisture.
In this comprehensive guide, we’ll walk you through essential steps to prevent water damage in your basement, ensuring your lower level remains as dry as a desert. So grab your favorite beverage (preferably not water) and let’s dive in!
Understanding the Causes of Water Damage
Before donning your work gloves, it’s crucial to understand the enemy—water. Water damage can stem from several sources:
1. **Poor Drainage**: If your yard doesn’t drain properly, rainwater may flow towards your foundation instead of away from it. This creates a puddle party right at your doorstep—or worse, your basement.
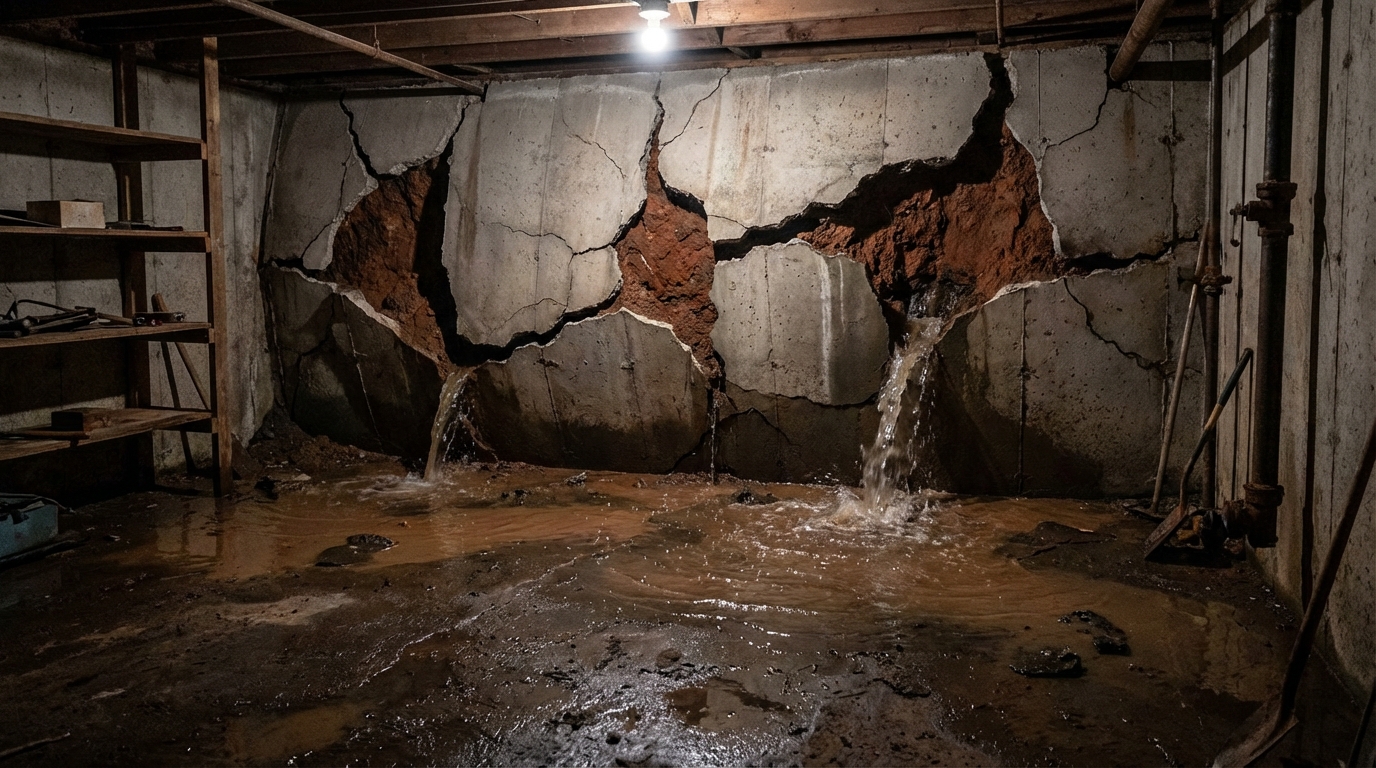
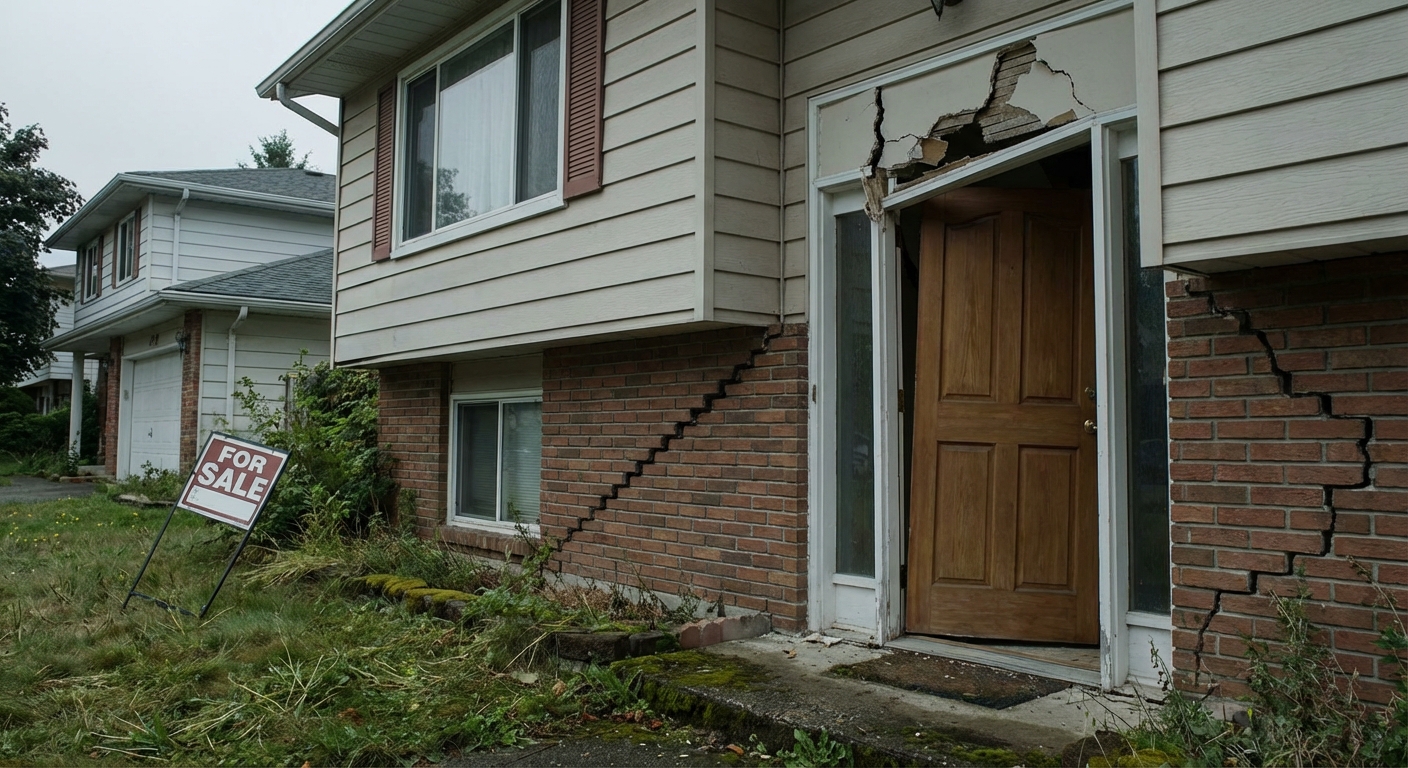
2. **Cracked or Failing Foundation**: Over time, your foundation may develop cracks due to settlement, temperature changes, or poor construction. These cracks are like open invitations for water to infiltrate your home.
3. **Roof Leaks**: A leaky roof might seem unrelated to your basement, but water can travel downward, creating chaos below if not addressed promptly.
4. **Sump Pump Failures**: Your trusty sump pump is your basement’s best defense against flooding. But if it’s not working correctly, it could be more of a liability than an asset.
5. **Clogged Gutters**: If your gutters are clogged with leaves and debris, water can overflow and pour down the sides of your foundation, leading to unwanted basement waterfalls.
Now that we know what we’re up against, let’s explore how to fortify your basement against these threats.
Step 1: Assess Your Property’s Grading
The first step in your waterproofing journey is to check the grading around your home. The soil should slope away from your foundation—think a mini-mountain range directing water away. If your yard resembles a flat plain, it’s time to grab a shovel and create that slope. A good rule of thumb is a drop of 6 inches over the first 10 feet away from the foundation.
Step 2: Clean and Maintain Gutters and Downspouts
Your gutters and downspouts play a vital role in preventing water from accumulating near your foundation. Regularly cleaning out leaves, twigs, and other debris is essential. Make it a seasonal ritual—consider it your home’s version of spring cleaning.
Ensure your downspouts extend at least five to six feet away from the base of your home. You can even add extenders if necessary. If your downspouts are discharging water too close to your foundation, it might as well be a “Welcome” mat for moisture!
Step 3: Inspect and Repair Your Foundation
It’s time for some detective work. Inspect your foundation for cracks or signs of wear. Even minor cracks can allow water to seep into your basement. Use a concrete patching compound to fill small cracks and seal them up tight. For larger cracks, consult a professional contractor. This isn’t the DIY project to take lightly—it’s better to be safe than soggy!
Step 4: Install a Sump Pump
A sump pump is your basement’s superhero, tirelessly working to keep water at bay. If you live in an area prone to heavy rains or flooding, installing a sump pump is a wise investment. Look for models with a battery backup—because who wants to be without power when the storm hits? Ensure your sump pit is properly sealed to minimize any odors and pest problems.
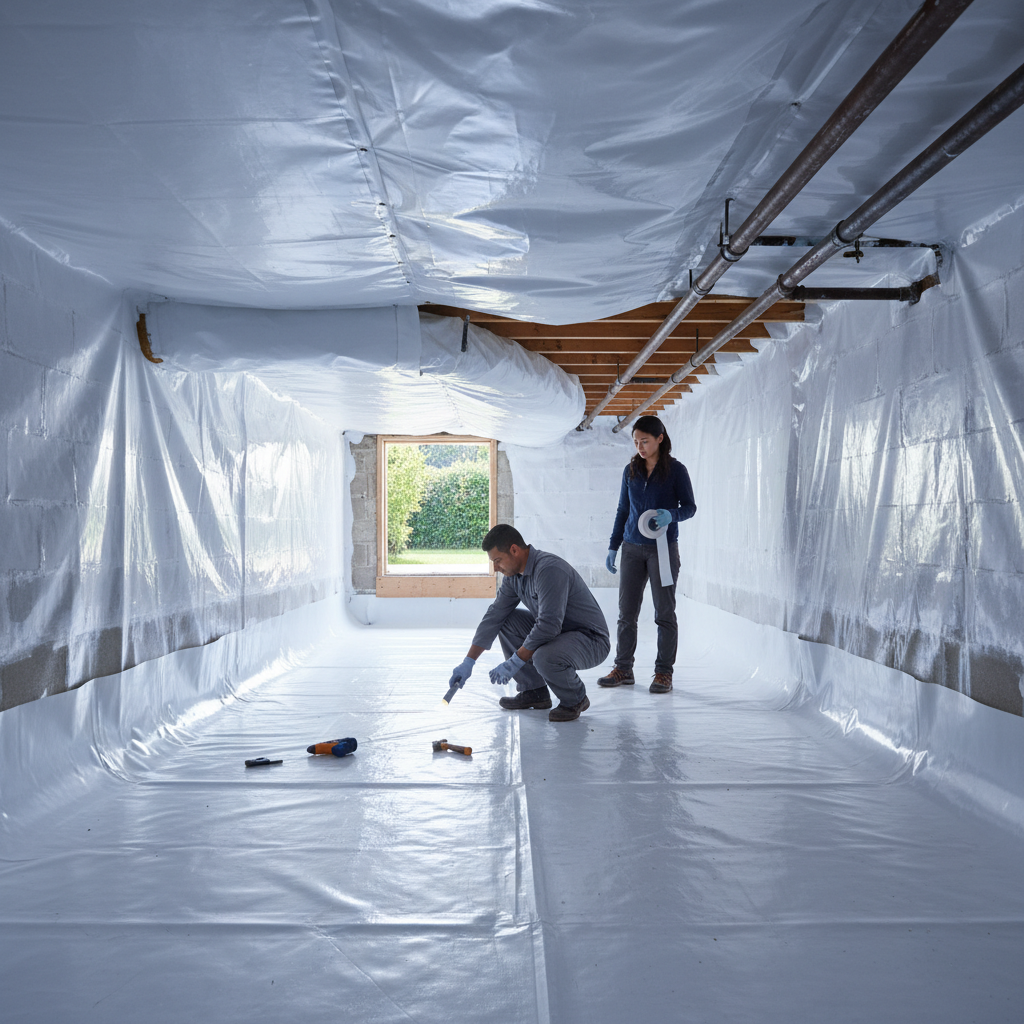
Step 5: Consider Interior Waterproofing Solutions
If you’re still worried about potential water ingress, consider interior waterproofing solutions. Here are a few options:
– **Waterproof Paints and Sealants**: Applying waterproof paint to your basement walls can create a barrier against moisture. Don’t forget to apply it on floors and any other surfaces that might come into contact with water.
– **Drainage Systems**: Installing an interior drainage system can help direct water to your sump pump, preventing any accumulation on the floor. French drains are a popular choice for this purpose.
– **Dehumidifiers**: Investing in a dehumidifier can help control humidity levels in your basement, creating a less inviting environment for mold and mildew.
Step 6: Address Exterior Water Management Systems
While we’ve focused primarily on the inside so far, don’t ignore the outside! Various exterior water management systems can help divert water away from your home:
– **French Drains**: These trenches filled with gravel and a perforated pipe are designed to redirect water away from your foundation. They’re particularly effective in areas with heavy rainfall.
– **Dry Wells**: A dry well collects excess rainwater runoff and allows it to gradually seep into the ground. It’s like a little reservoir for your yard, keeping the water out and the dryness in.
– **Rain Gardens**: Transform a corner of your yard into a small paradise that absorbs rainwater. Plant native plants in a depression, allowing water to pool and evaporate naturally, instead of pooling around your house.
Step 7: Maintain Your Lawn and Landscaping
Your lawn and landscaping can significantly impact basement moisture levels. Be sure to regularly mow and trim shrubs to avoid blocking drainage areas. Also, avoid planting trees or large shrubs too close to your home, as their roots can interfere with drainage systems and attract moisture.
If you’re feeling adventurous, consider using landscaping rocks or mulch in areas where water drainage is a concern. Not only does it look great, but it can also help absorb excess moisture.
Step 8: Monitor Indoor Humidity Levels
Keep an eye on humidity levels indoors, especially in the basement. Ideally, indoor humidity should be between 30% and 50%. You can easily monitor humidity levels with a hygrometer—an inexpensive gadget that can save you from musty odors and mold growth.
If humidity levels creep up, running your air conditioning or dehumidifier can provide relief. This small effort can prevent water damage from sneaking in through the cracks you might have missed.
Step 9: Prepare for Seasonal Changes
As seasons change, so do the risks associated with moisture. During heavy rains or snowmelt, take extra precautions to monitor your basement. Check your sump pump regularly to ensure it’s in good working condition. If you notice any leaks or dampness, address them immediately.
Before winter hits, make sure to clear your gutters and downspouts from any fall foliage. An ounce of prevention is worth gallons of water saved later!
Step 10: Get Professional Help When Needed
Sometimes, despite your best efforts, water damage can still occur. If you find yourself with persistent moisture problems that you can’t seem to resolve, don’t hesitate to call in the experts. Professional waterproofing services can provide solutions tailored to your specific needs and give you peace of mind. After all, a dry basement is a happy basement!
Final Thoughts
Water damage doesn’t have to be the villain in your homeowning story. By following these essential steps to prevent water damage and employing a proactive approach to basement waterproofing, you can create a fortress where moisture fears to tread. Your basement will become a valuable space for storage, recreation, or maybe even a cozy movie night—sans the sogginess.
So, roll up those sleeves and start implementing these measures today. Remember, a little prevention now can save you from significant troubles (and costs) down the line. Keep that basement dry, and enjoy peace of mind knowing you’ve done your part to protect your home!