Essential Guide to Understanding Crawl Space Encapsulation: Benefits and Best Practices
Crawl spaces might seem like the forgotten corners of your home, often overlooked and left to gather dust (or worse). Yet these small areas can significantly impact your home’s health and efficiency. If you’ve ever experienced a musty odor wafting through your living room or noticed higher energy bills, it might be time to venture into that dimly lit space beneath your house. One effective solution? Crawl space encapsulation. In this guide, we will discuss what crawl space encapsulation is, its benefits, best practices, and everything you need to know to keep your home safe and sound.
What is Crawl Space Encapsulation?
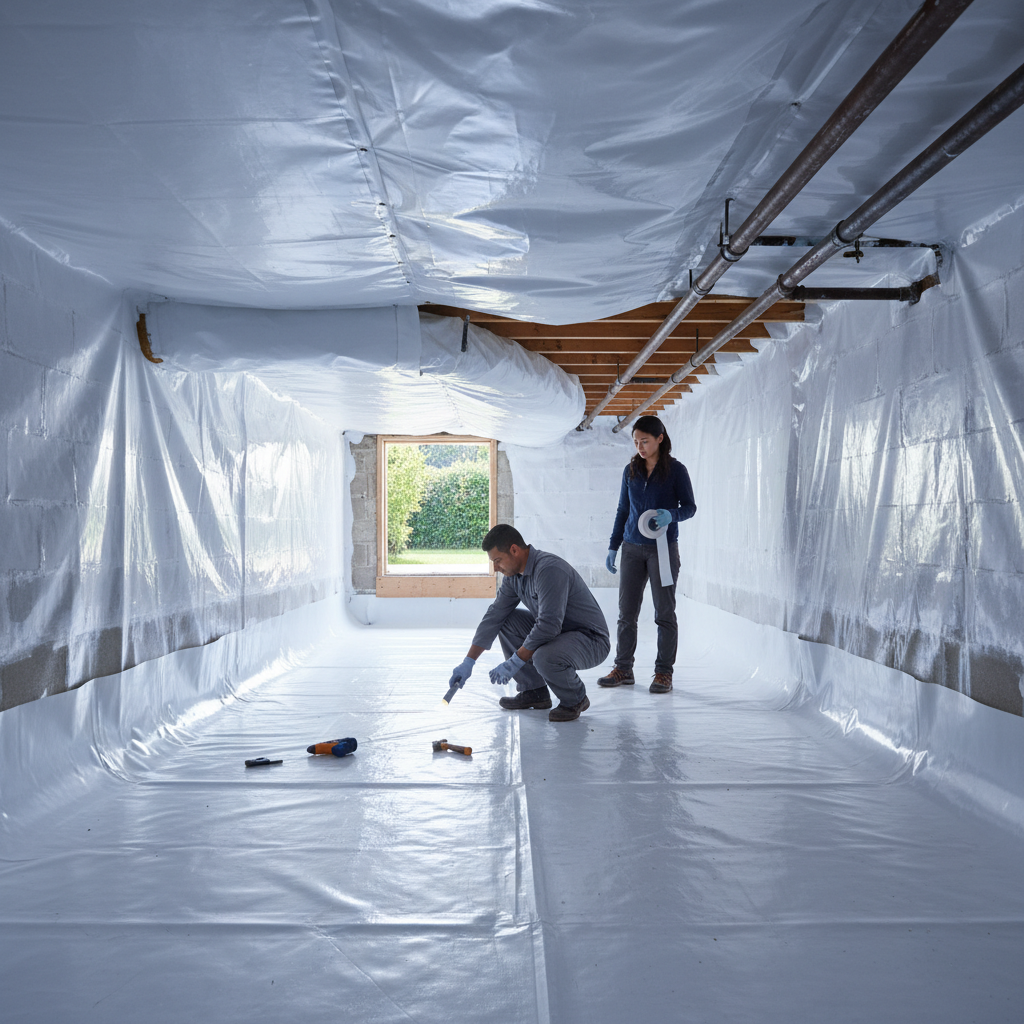
Before we dive into benefits and practices, let’s take a moment to understand what crawl space encapsulation is. In simple terms, it’s like putting a cozy blanket around your crawl space… if that blanket could also fight off moisture, pests, and mold. Encapsulation involves sealing the crawl space with a vapor barrier, insulating walls, and sometimes adding a dehumidifier and drainage system. This barrier keeps moisture from entering the area, which helps prevent problems that can affect the rest of your home.
Why Do You Need Crawl Space Encapsulation?
Ah, the million-dollar question! Well, let’s think about it. Your crawl space may sit just above ground level, but its impact on your home is profound. Here are some reasons to consider crawl space encapsulation:
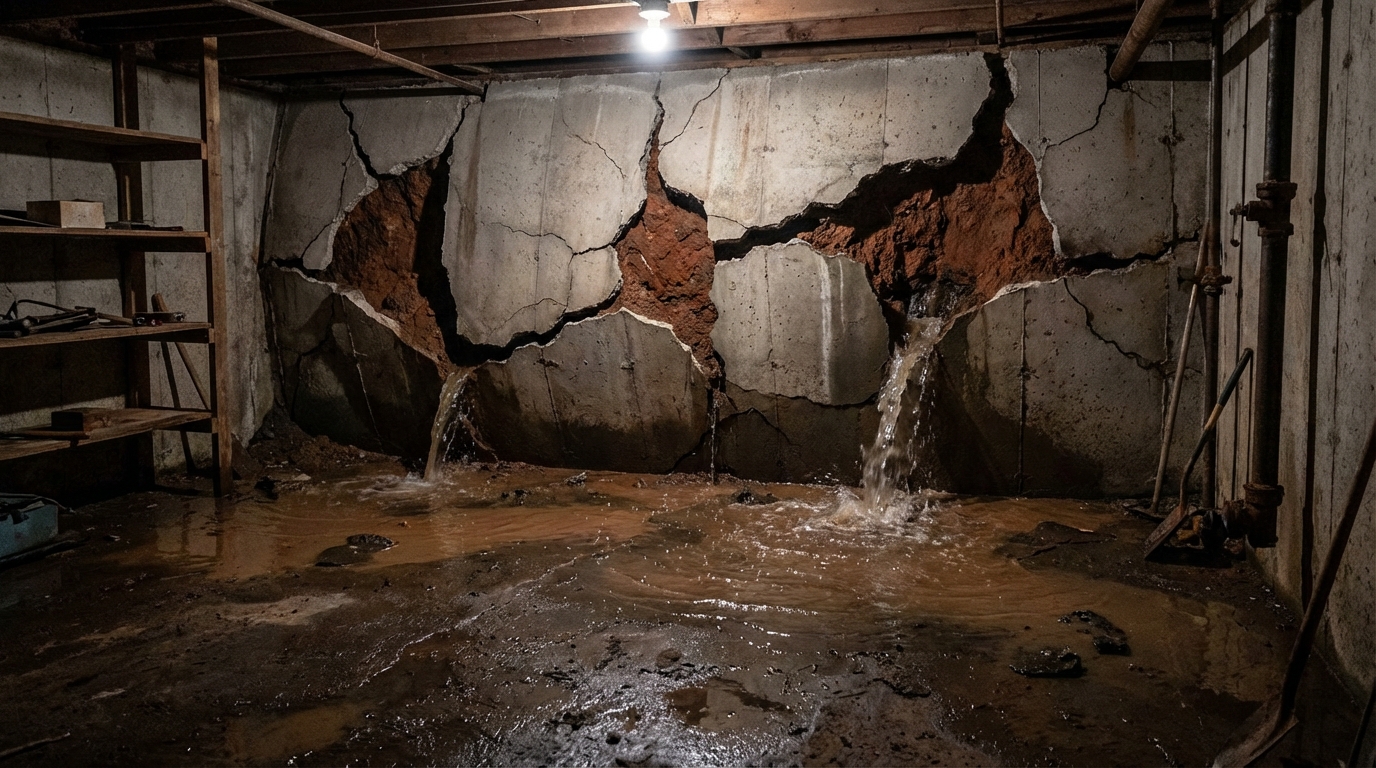
1. **Moisture Control**: Moisture is public enemy number one when it comes to crawl spaces. Keeping humidity at bay prevents mold growth and helps maintain air quality in your home.
2. **Improved Air Quality**: If you’ve ever wondered why allergies go haywire in your house, look no further than the crawl space. Encapsulating can improve overall indoor air quality by reducing mold spores and other allergens.
3. **Energy Efficiency**: A sealed crawl space can positively affect your energy bills. By controlling moisture and temperature, your heating and cooling systems don’t have to work as hard, leading to potential savings.
4. **Pest Prevention**: No one likes uninvited guests, especially if they have six legs. Encapsulation helps deter pests like rodents and insects, which thrive in damp environments.
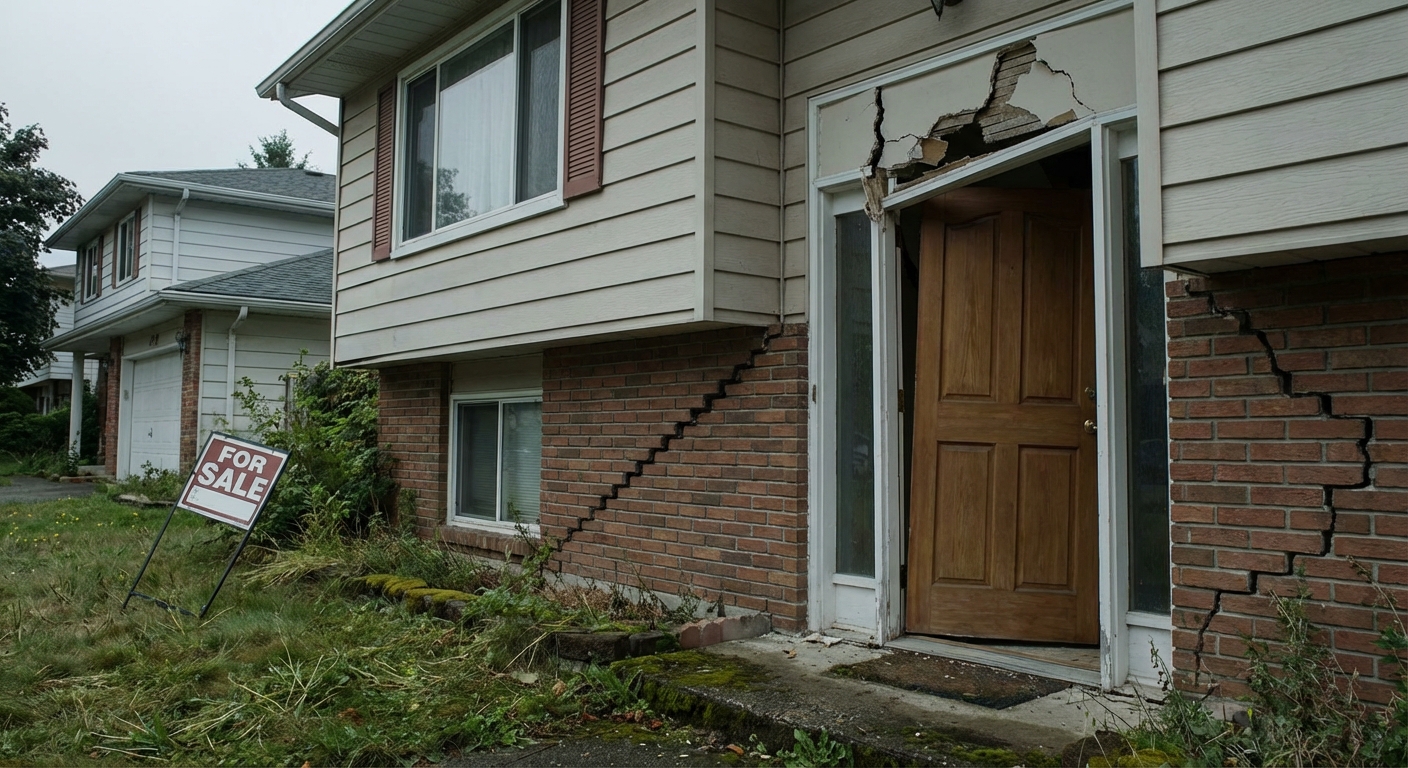
5. **Increased Home Value**: When it comes time to sell your home, having an encapsulated crawl space can be a significant selling point. Prospective buyers see this as a valuable investment for their health and home maintenance.
6. **Structural Integrity**: Moisture can weaken wooden structures over time. Keeping things dry helps protect the integrity of your home’s foundation and framing.
7. **Mitigated Odors**: Let’s face it, a crawl space can smell pretty bad if it’s damp. An encapsulated space puts that old musty smell to bed, improving the overall atmosphere of your home.
Best Practices for Crawl Space Encapsulation
Now that you’re onboard with the “why,” let’s discuss the “how.” Here are some best practices to ensure you’re encapsulating your crawl space effectively:
1. **Inspection First**: Before you begin encapsulation, conduct a thorough inspection of your crawl space. Look for signs of moisture, mold, and pests. Address any existing issues before sealing things up.
2. **Choose the Right Vapor Barrier**: The vapor barrier is a crucial component of crawl space encapsulation. Look for a high-quality polyethylene barrier, typically at least 6 mil thick. Thicker barriers offer better protection against moisture.
3. **Seal All Vents and Openings**: If your crawl space has vents, they need to be sealed off to prevent outside air from entering and causing moisture issues. Use rigid foam insulation or other suitable materials to seal these openings.
4. **Insulate Walls**: Insulating the walls of your crawl space helps maintain a consistent temperature. Use rigid foam board insulation for optimal results. Make sure to cover all walls, leaving no gaps for drafts.
5. **Install a Dehumidifier**: In humid climates, a dehumidifier can be a game-changer. This device removes excess moisture from the air, keeping your crawl space’s humidity levels in check.
6. **Consider Drainage Solutions**: If water tends to accumulate in your crawl space, consider installing a drainage system. This might include sump pumps or French drains to channel water away from your home’s foundation.
7. **Regular Maintenance**: Just because you’ve encapsulated your crawl space doesn’t mean you can forget about it. Schedule regular inspections to ensure the integrity of the encapsulation and check for any signs of moisture or pest infiltration.
8. **Hire a Professional**: While DIY projects can be fun and rewarding, encapsulating a crawl space is a task that’s often best left to professionals. They have the tools, experience, and know-how to get the job done right the first time.
Costs of Crawl Space Encapsulation
Let’s talk turkey—how much does it actually cost to encapsulate your crawl space? Costs can vary widely depending on factors such as the size of the space, the materials used, and whether you hire a professional or tackle it yourself. Generally, you can expect to pay anywhere from $1,500 to $15,000 for a complete encapsulation. While that might sound hefty, consider this investment as a way to avoid costly repairs down the road.
DIY vs. Professional Encapsulation
Speaking of costs, some homeowners opt for a do-it-yourself approach to save money. While it’s certainly possible to encapsulate a crawl space on your own, be prepared for a bit of elbow grease—and possibly a few trips to your local hardware store. If you decide to go the DIY route, make sure you’re fully prepared with the necessary materials, tools, and knowledge.
That said, hiring a professional may be a wise choice if you’re not comfortable working in tight spaces or dealing with potential mold issues. Professionals bring experience and expertise that can ensure the job is done correctly, which can save you headaches (and money) in the long run.
Common Mistakes to Avoid
If you choose to tackle crawl space encapsulation yourself or even if you hire a professional, be aware of common mistakes that can undermine your efforts:
1. **Skipping the Inspection**: Rushing into encapsulation without assessing current issues can lead to larger problems later. Don’t cut corners; inspect thoroughly!
2. **Using Thin Vapor Barriers**: Thin barriers may seem like a good idea until moisture starts seeping through. Invest in a high-quality vapor barrier to ensure effectiveness.
3. **Ignoring Ventilation Needs**: While sealing off vents is important, completely locking your crawl space can create a stagnant environment. Ensure proper ventilation to avoid trapping moisture.
4. **Neglecting Regular Checks**: Just because your crawl space is encapsulated doesn’t mean it’s guaranteed to stay that way. Schedule regular inspections to catch any issues early.
Conclusion
Crawl space encapsulation is an essential practice for maintaining a healthy home environment. By controlling moisture, improving indoor air quality, increasing energy efficiency, and preventing pests, you can ensure your home remains a safe haven for years to come. Whether you choose to do it yourself or enlist the help of professionals, understanding the benefits and best practices of crawl space encapsulation will empower you to make informed decisions that can enhance your home’s comfort and longevity.
So the next time you hear a creak from beneath your floorboards, remember: it could very well be your crawl space reminding you it’s time for a little TLC. With the right approach, you can give that underbelly the care it deserves, keeping your home—and its inhabitants—in tip-top shape!